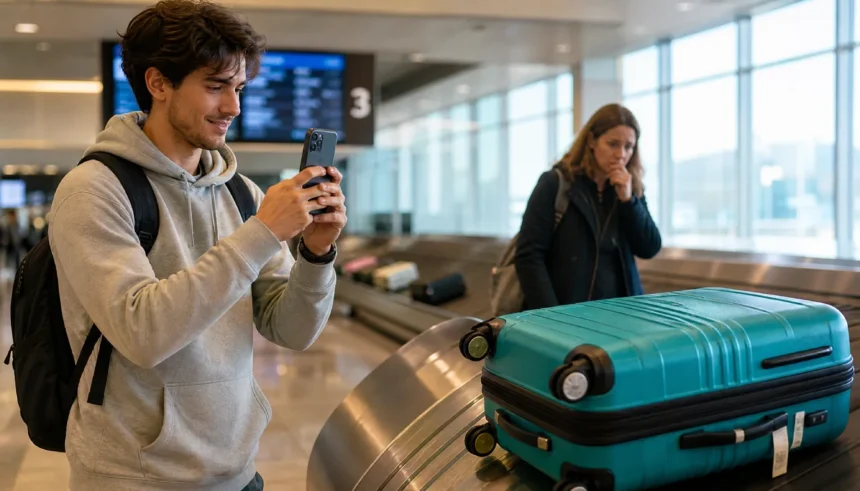
You step off a long flight, tired but relieved — and then you watch the baggage carousel go round and round without your suitcase. That gut-punch moment happens to thousands of travelers every single day. Here’s the thing: one 30-second habit — specifically, knowing why you should take a photo of your luggage before traveling — can turn that panic into a manageable, even fast process. In this guide, I’ll show you exactly why this habit matters, what to photograph, and how to use those photos when something goes wrong.
The Real Cost of Lost Luggage (and Why a Photo Changes Everything)
Airlines mishandle roughly 26 million bags every year worldwide. Most are delayed. Some are lost permanently. And when yours goes missing, the first thing the airline agent asks is: “Can you describe your bag?”
If your answer is “black suitcase with wheels,” you’re already in trouble.
- Over 30% of lost bags are never reunited with their owners, partly because of poor identification.
- The average compensation for a permanently lost bag under the Montreal Convention caps at roughly $1,700 — but that payout depends heavily on your ability to prove what was inside.
- A single clear photo of your closed bag — and another of its contents — immediately separates you from 90% of other claimants standing at that same desk.
A photo is free. A lost bag isn’t. That’s the real cost equation here.
5 Powerful Reasons You Need a Luggage Photo Before Every Flight
Let’s get specific. Here are five situations where a luggage photo goes from “nice to have” to essential.
1. It speeds up lost baggage claims dramatically
Airline agents are dealing with dozens of reports per shift. When you pull out a clear photo of your bag — showing its color, shape, brand logo, and any unique tags — you move to the front of the queue mentally. The report gets filed accurately, and your bag gets found faster.
2. It works as undeniable luggage photo lost bag proof
In a dispute — whether with an airline, a hotel, or a third-party luggage handler — a timestamped photo is hard evidence. It proves the bag existed, what it looked like, and roughly when it was last in your possession.
3. It supports travel insurance claims
Many travel insurance policies require documented evidence of lost or damaged items before paying out. A photo of your packed contents — clothes, electronics, toiletries — is exactly the kind of proof adjusters ask for. Without it, claims can be delayed or reduced.
4. It identifies damage at pickup
Sometimes bags arrive — just battered. A before-and-after comparison (your pre-flight photo vs. the damaged bag at pickup) is the clearest way to file a damage claim on the spot. No photo means no comparison means no claim.
5. It gives you genuine peace of mind
I know “peace of mind” sounds vague, but there’s real psychological value here. When you’ve documented your bag, you board the plane having done everything in your control. That low-level anxiety about checked luggage? It drops noticeably.
What Exactly Should You Photograph? (A Foolproof Checklist)
This is where most travel tip articles stop short. They tell you to take a photo — but not what to photograph. Here’s the complete list of how to document luggage for travel, in the right order.
Your pre-flight luggage photo checklist:
- ☑ Closed bag, full view — Stand the suitcase upright. Capture the entire bag, including the brand name and model if visible.
- ☑ Luggage tag (close-up) — Photograph your name, address, and phone number on the tag. This alone has reunited hundreds of bags.
- ☑ Any unique identifiers — Colorful strap, ribbon, sticker, scratch, or pattern. These are what agents actually use to spot your bag.
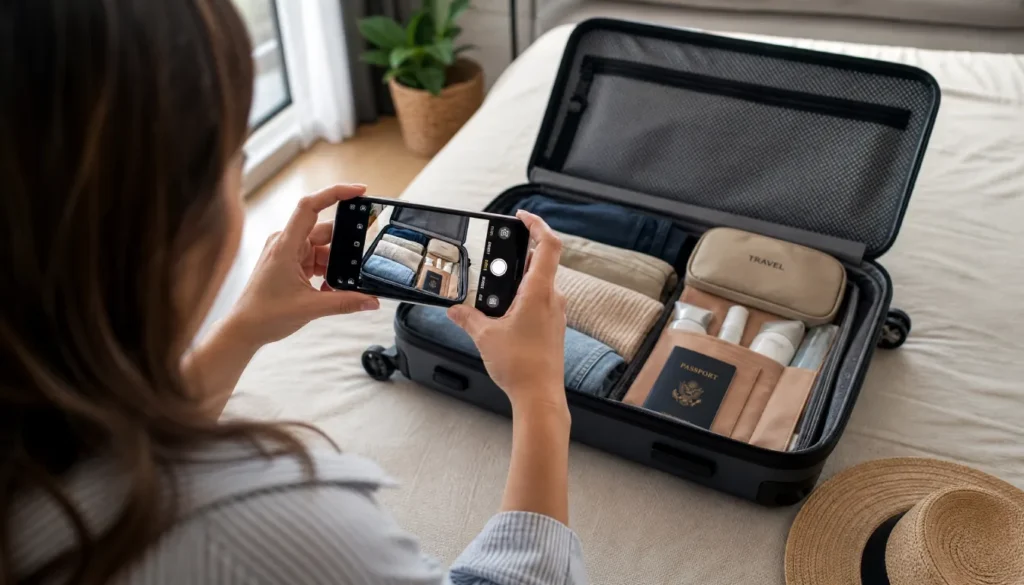
- ☑ Open bag, contents view — Top-down shot of everything packed. Don’t stage it — photograph it as packed.
- ☑ High-value items separately — Laptop, camera, medication, jewelry. Photograph each item next to its serial number or receipt, if possible.
- ☑ Bag dimensions label — Useful if there’s a weight or size dispute at check-in or during a claim.
Take all of these on your phone at the airport, right before check-in — not at home the night before. A timestamped photo from the airport is more useful as evidence than one taken at home.
How to Use Your Luggage Photo for a Lost Baggage Claim
I still remember my first solo trip — Rome, two connecting flights, one very excited 24-year-old. My checked bag didn’t arrive. The agent asked, “What does it look like?” and all I could say was “black… with wheels.” The agent typed something, handed me a reference number, and sent me on my way.
Forty-eight hours later, I had my bag back — by pure luck.
Since that trip, I’ve photographed every single bag I’ve ever checked. And it has already saved me twice: once in Bangkok and once in Istanbul, where the photo on my phone identified my bag within 20 minutes at the baggage service desk.

Here’s exactly what to do at the lost baggage desk:
Step 1: File the Property Irregularity Report (PIR) before you leave the airport. Don’t go to your hotel first. The clock starts the moment you leave the terminal. Show the agent your photo immediately — it speeds up the report.
Step 2: Show photos in this order. First, the closed bag (so they can log the visual), then the luggage tag close-up (so tracing systems can match it faster), then the contents photo (for insurance documentation).
Step 3: Email yourself the photos before your trip. If your phone is lost or dead, you’ll still have a copy accessible from any device. A cloud folder or travel app works equally well.
Step 4: Keep your PIR reference number and the photos together. Screenshot the reference number and store it in the same album as your luggage photos. When the airline calls, you’ll have everything in one place.
Luggage Photos and Travel Insurance – A Winning Combination
Travel insurance is only as useful as your ability to prove a claim. This is where luggage photo for insurance purposes becomes genuinely important — not optional.
Most comprehensive travel insurance policies cover:
- Lost or permanently missing bags
- Delayed luggage (usually after 6–12 hours)
- Damage to contents
But all three require documentation. Specifically, insurers typically ask for:
- The airline’s written PIR confirmation
- A description or photo of the bag
- Receipts or photos of high-value items inside
Without photos of contents, you’re relying on memory — and adjusters know memory inflates values. A photo from your phone taken before the flight is objective, timestamped, and hard to dispute.
Pro tip from frequent travelers: For electronics or valuables, keep the original receipt in a cloud folder alongside your luggage photos. That combination — photo plus receipt — virtually guarantees a clean, fast insurance payout.
Smart Tips from Frequent Travelers (That Most People Overlook)
Beyond the basics, here are habits I’ve picked up from road warriors who rarely lose a bag — and bounce back fast when they do.
- Use a distinctive luggage strap or tag color. A bright orange strap on a black suitcase is visible from 30 meters away on a carousel. It also makes your photo unmistakable.
- Label the inside of your bag too. Stick a piece of paper with your name, phone, and email inside the lid. If the tag gets torn off, agents can still ID the bag if it’s opened.
- Photograph the bag again at layovers. If you’re connecting through a busy hub (Heathrow, Dubai, JFK), a quick photo of your bag going onto the belt at each connection gives you a timestamped chain of custody.
- Save photos to an offline folder. Cloud sync is great — until you’re in an airport with no Wi-Fi. Keep the last three trips’ luggage photos downloaded locally on your phone.
- Note the bag weight before checking in. If a bag comes back lighter than you checked it, that photo of the contents plus the weight discrepancy is strong grounds for a tampered-luggage claim.
Your 30-Second Pre-Flight Photo Routine
You now have everything you need. Here’s how this travel tip — take a picture of your bag — fits into a smooth, fast routine that adds zero stress to your check-in.
At home (night before):
- Photograph the packed, open suitcase.
- Photograph any high-value items separately.
At the airport (right before check-in):
- Stand the bag upright. Take one full-body shot.
- Close-up of the luggage tag.
- Close-up of any unique identifiers (strap, sticker, scratch).
After shooting:
- Email or cloud-sync the photos.
- Keep them in a dedicated “Travel Docs” album.
- Board your flight. You’re done.
That’s it. Six photos. Thirty seconds. Unlimited protection.
Conclusion
Knowing why you should take a photo of your luggage before traveling isn’t about being paranoid — it’s about being prepared. One set of simple photos turns a potential nightmare into a manageable process: faster lost bag reports, stronger insurance claims, and the calm confidence of knowing you’ve done your part.
The next time you’re at the check-in counter, pull out your phone before you hand over that bag. Take the six photos, sync them to your cloud, and walk to the gate knowing you’re covered.
Have you ever lost a bag — and wished you had a photo?
Share your story in the comments below. And if this guide helped you, pass it on to someone who travels often. It might be the most useful 30 seconds of advice they ever get.