I still remember standing in my old apartment bathroom, staring at a grapefruit-sized hole where the towel bar used to be. My heart sank. The landlord was coming in three days, and I had zero tools, zero skills, and absolutely no desire to coat every surface in fine white dust.
Sound familiar?
If you have ever tried to patch a wall and ended up with sanding dust in your coffee, your lungs, and somehow your sock drawer, you know exactly what I mean. Drywall repair has a reputation for being messy, slow, and annoying. But here is the good news: you can patch a small hole in drywall without sanding, and it actually works.
This guide walks you through the whole process, step by step, with product tips, mistakes to avoid, and zero drama.
Why Most People Dread Drywall Repair (And Why You Do Not Have To)
The sanding part is what stops most people cold. You apply the compound, wait for it to dry, then grab sandpaper and grind away while white powder floats everywhere. It settles on your furniture, in your eyes, and into every corner of the room.
The good news? For small holes, you can skip sanding entirely. With the right product and a little technique, you get a smooth, paint-ready surface without ever picking up sandpaper.
What Counts as a “Small” Hole?
Before we get into the how, let us define the what.
A small hole is generally anything up to about 4 inches in diameter. Think:
- Nail holes and screw holes
- Doorknob dents
- Anchor holes from shelves or curtain rods
- Small punch-through dents
For holes larger than 4 to 6 inches, you will likely need a drywall patch kit with a backer board and some light sanding. But for anything in the small-to-medium range, the no-sand method works perfectly.
What You Need for a No-Sand Drywall Patch
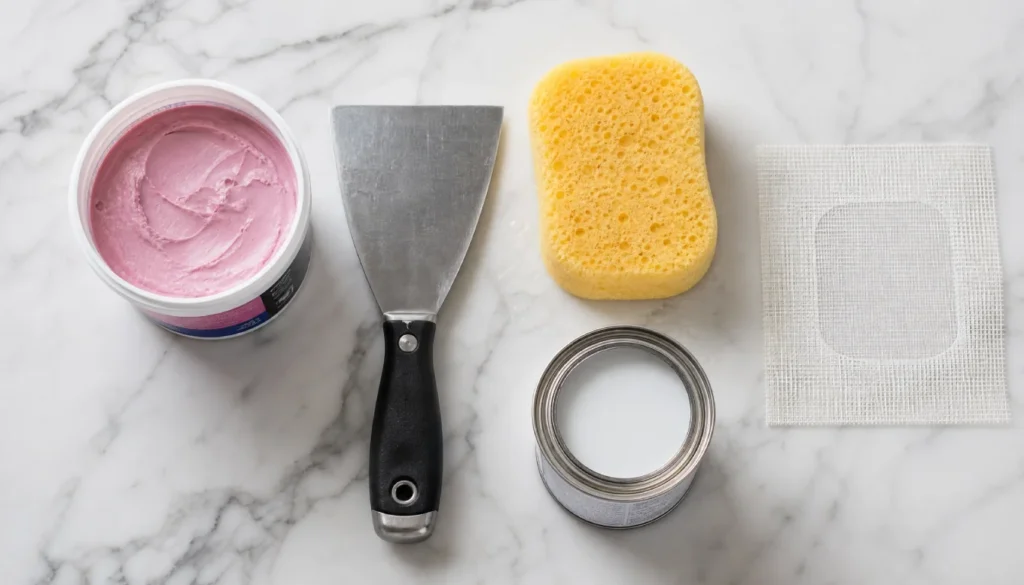
Here is your short supply list:
- No-sand spackle (DAP DryDex, 3M Patch Plus Primer, or similar lightweight spackle)
- Putty knife or drywall knife (a 3-inch one works for most small holes)
- Damp sponge or damp cloth
- Self-adhesive mesh patch (for holes bigger than a nail hole)
- Primer (optional but smart before painting)
- Matching paint
That is it. No power tools. No orbital sander. No drop cloths the size of a circus tent.
Step-by-Step: Patch Drywall Without Sanding
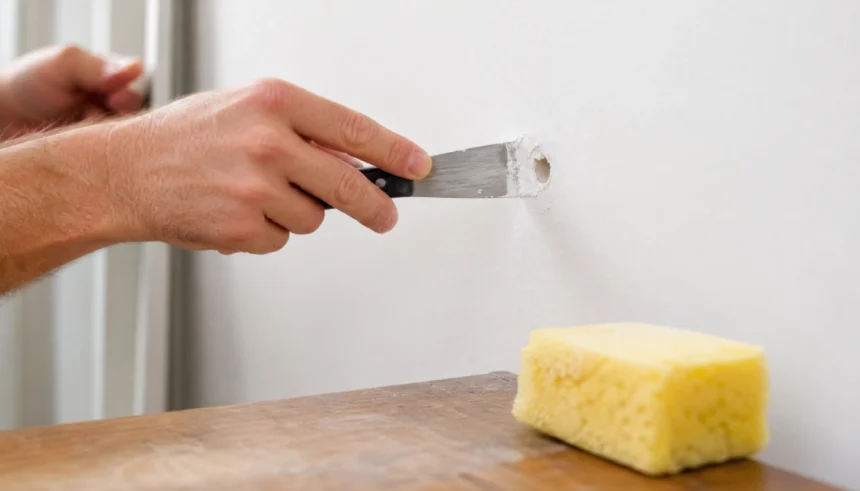
Step 1: Clean the Hole
Remove any loose paper, crumbled drywall, or stuck debris around the hole. Use your fingers or a putty knife to clear the edges. The surface needs to be clean and stable before you apply anything.
Step 2: Apply a Mesh Patch (For Holes Over Half an Inch)
For holes larger than a small nail hole, press a self-adhesive mesh drywall patch over the opening. These peel-and-stick patches are cheap, fast, and give the compound something solid to grip.
For nail holes or tiny screw holes, skip the patch and go straight to the next step.
Step 3: Apply No-Sand Spackle
Scoop a small amount of no-sand spackle onto your putty knife. DAP DryDex is a popular choice because it goes on pink and turns white when it is fully dry, so you know exactly when you can move on.
Press the spackle firmly into the hole, then pull the knife at a slight angle across the surface to smooth it flat. The goal here is to get the compound as level as possible with the surrounding wall.
Pro tip: Apply in thin layers for larger holes. One thick glob will crack as it dries.
Step 4: Smooth It With a Damp Sponge (This Replaces Sanding)
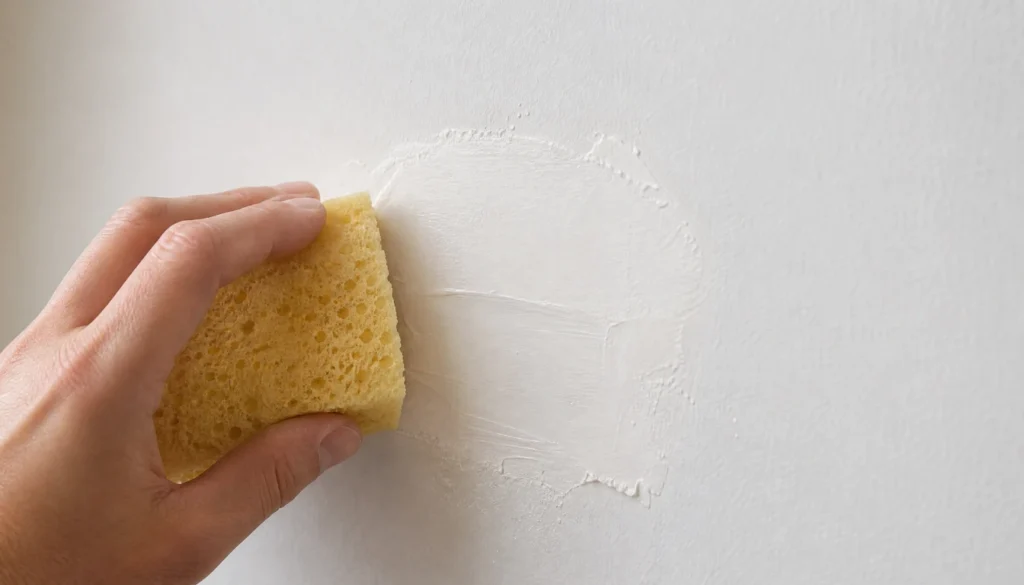
While the spackle is still slightly wet (not bone dry), take a barely damp sponge and gently smooth the surface in small circular motions. This step is the key to skipping sandpaper.
The damp sponge technique feathers the edges so the patch blends into the surrounding wall. Wipe lightly. You are not scrubbing; you are barely touching it.
If the spackle is already dry, slightly dampen it with a wet fingertip first, then use the sponge.
Step 5: Let It Dry Completely
For most no-sand spackles, drying time is 30 minutes to 2 hours, depending on the hole size and humidity. If you used DryDex, wait until the pink color disappears completely.
Do not rush this. Painting over wet compound causes bubbling and peeling.
Step 6: Prime and Paint
Once dry, apply a coat of primer over the patch. This prevents the repair from showing through the paint as a flat, dull spot. Let the primer dry, then paint to match your wall.
If you used 3M Patch Plus Primer, you can sometimes skip a separate primer coat entirely since the product includes primer built in.
Best No-Sand Spackle Products (Quick Comparison)
| Product | Best For | Dries Dusty? | Notes |
|---|---|---|---|
| DAP DryDex | Nail holes to medium holes | No | Color-change indicator |
| 3M Patch Plus Primer | Small holes, quick fixes | No | Has a built-in primer |
| Elmer’s Carpenter’s Wood Filler | Nail holes only | No | Budget-friendly |
| Lightweight spackle (generic) | All small holes | Minimal | Check label for “no-sand.” |
Mistakes to Avoid
Applying too much at once. Thick coats crack and shrink. Thin layers are always better.
Using the wrong product. Not all spackle is unsanded. Check the label before you buy. Look for “no-sand,” “lightweight,” or “sandpaper-free” claims.
Skipping the damp sponge step. This is what makes the whole no-sand approach work. Do not skip it.
Painting before the compound is fully dry. It looks fine at first, then bubbles up a few hours later. Always wait.
Using regular joint compound without smoothing it carefully. Standard all-purpose joint compound dries harder and is trickier to smooth without sanding. Stick to lightweight spackle for the no-sand method.
Tips for a Smooth Finish Without Sandpaper
- Work in a well-lit room so you can see high spots and thin areas.
- Use a wide putty knife (4 to 6 inches) for flatter, smoother results.
- Feather the edges by pressing lighter as you pull the knife toward the wall surface.
- If you get a small ridge, wet your fingertip and press it flat before the compound sets.
- For textured walls, press a damp sponge lightly over the patch while it is still slightly tacky to create a rough texture that matches.
Frequently Asked Questions
Can you really patch drywall without sanding?
Yes, for small holes. With no-sand spackle and the damp sponge technique, you can get a smooth, paint-ready finish without any sandpaper.
What is the best spackle that does not need sanding?
DAP DryDex and 3M Patch Plus Primer are two of the most trusted options. Both go on smoothly, dry without crumbling, and require no sanding when applied correctly.
Do I need to sand spackle before painting?
Not if you use a no-sand spackle and smooth it properly with a damp sponge. Standard spackle or joint compound usually needs light sanding for a smooth finish.
How do I avoid drywall dust when patching?
Use a no-sand spackle and the wet sponge smoothing technique. This keeps the repair completely dust-free. No power tools, no sandpaper, no mess.
Can renters use this method before moving out?
Absolutely. This is one of the most renter-friendly repair methods available. No special tools, no loud power tools, and the result looks clean and professional.
You Can Do This
Drywall repair sounds intimidating, but for small holes, it is genuinely one of the easiest fixes in home maintenance. You do not need special skills. You do not need a shop vac, a respirator mask, or a sander.
You need a tub of no-sand spackle, a putty knife, and a damp sponge. That is the whole job.
Once you do it once, you will wonder why you ever called a handyman for nail holes. Give it a try, and if you run into a question along the way, drop it in the comments. I read every one of them, and sometimes the best tips come from someone who just figured it out in their own living room.
Go patch that wall. You have got this.