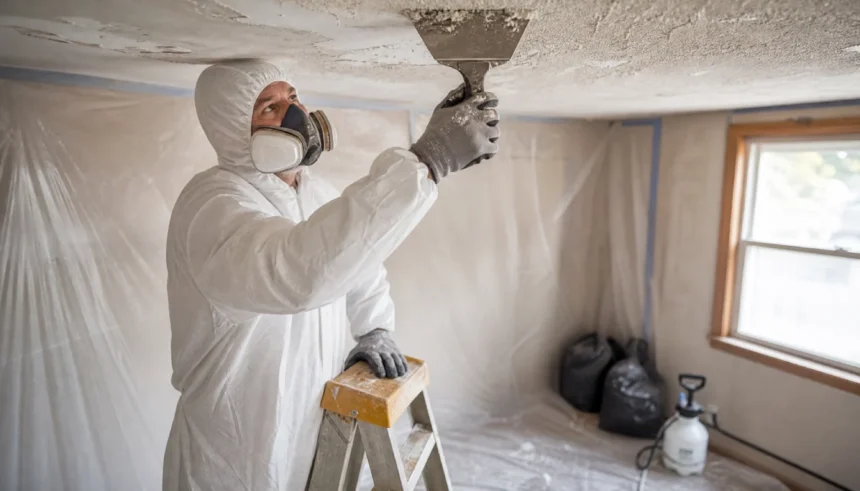
I still remember standing on a ladder in my first house, scraper in hand, staring at that bumpy popcorn ceiling and wondering if I was about to make a huge mistake. My house was built in the 1970s. I had no idea if that ceiling had asbestos in it. I didn’t want to pay for a test, and I didn’t want to wait weeks for results either.
If you’re in that same spot right now, I get it. You want your ceiling gone. You want it gone soon. And you want to do it without breathing in something dangerous or spending money you don’t have.
Here’s the good news. You can remove a popcorn ceiling safely without testing for asbestos first, as long as you treat it like it might contain asbestos the whole time. That one mindset shift changes everything about how you work.
In this guide, I’ll walk you through exactly how to do that. We’ll cover the gear you need, the wet removal method, room setup, common mistakes, and answers to the questions I hear most often.
Why People Skip Asbestos Testing
Testing costs money. Lab results can take days or weeks. And honestly, a lot of homeowners just want to get the project started. None of that makes you careless. It just makes you human.
The trick is not skipping the test because you assume it’s fine. The trick is skipping the test because you plan to treat the ceiling as if it definitely contains asbestos. That approach protects you either way.
The Golden Rule: Assume Asbestos Is Present
This is the whole safety strategy in one sentence. If your home was built before 1980, treat the popcorn ceiling as an asbestos-containing material, no matter what.
Why does this matter so much? Asbestos fibers are dangerous when they become airborne and get inhaled. Dry scraping and sanding kick fibers into the air. Wet methods keep them stuck to the ceiling and out of your lungs.
So the entire process below is built around one goal. Keep the material wet, keep it contained, and keep it out of the air you breathe.
What You’ll Need Before You Start
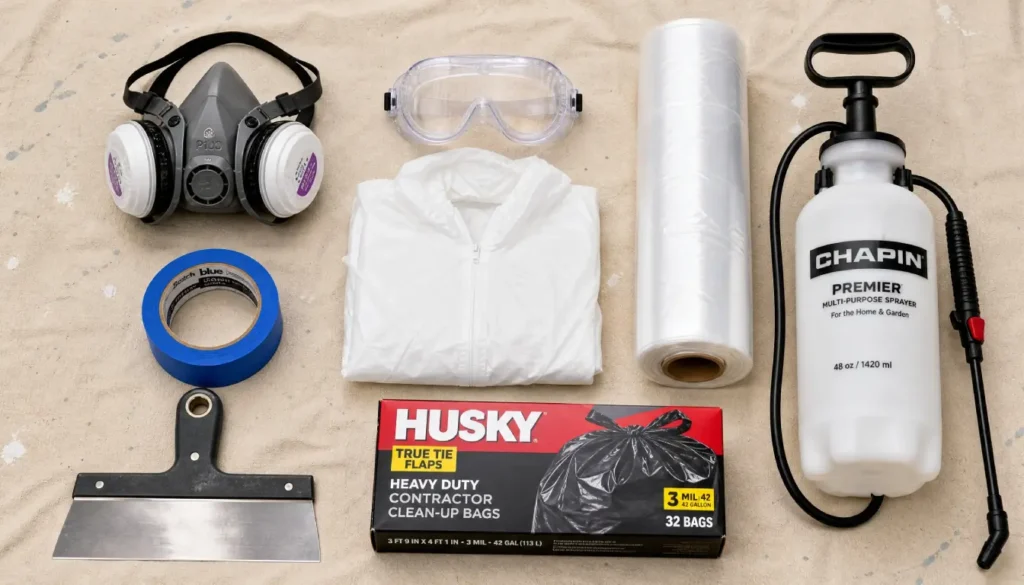
Here’s your shopping or rental list. Don’t skip anything on it.
- P100 respirator mask, not a basic dust mask
- Full body coverall suit with a hood
- Safety goggles that seal around your eyes
- Plastic sheeting for floors, walls, and doorways
- Painter’s tape to seal the plastic
- Garden pump sprayer for wetting the ceiling
- Wide drywall knife or ceiling scraper
- HEPA vacuum, not a regular shop vac
- Heavy-duty trash bags rated for construction debris
- Box fan, only if you’re using it for exhaust, not general airflow
A HEPA vacuum matters here. Regular vacuums can push tiny fibers right back into the air through their exhaust. A HEPA filter traps particles that small, which is exactly what you need.
Step by Step: The Wet Removal Method
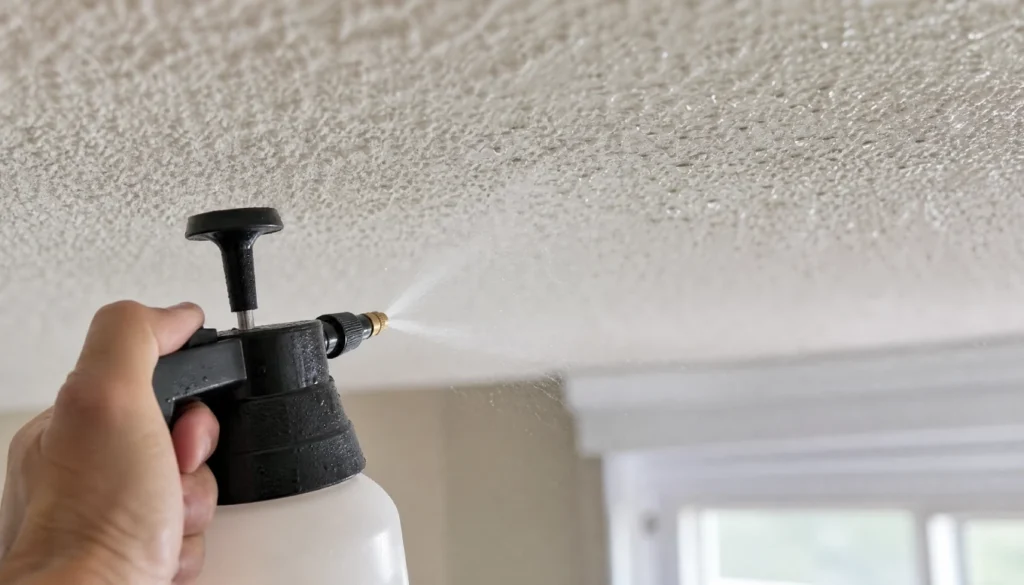
This method has been the standard recommendation for decades, precisely because it minimizes dust. Here’s how it works.
1. Seal Off the Room
Cover the floor completely with plastic sheeting and tape the edges down. Tape plastic over doorways, vents, and light fixtures too. You’re building a containment area, not just protecting your floor.
2. Turn Off the HVAC System
Shut off your heating and cooling system before you start. You don’t want fibers pulled into your ductwork and spread through the rest of the house.
3. Wet the Ceiling Thoroughly
Fill your garden sprayer with warm water. A few drops of dish soap help the water soak in better. Spray a small section of ceiling and let it sit for ten to fifteen minutes. The texture should look soaked, not just damp.
4. Scrape Gently
Hold your drywall knife at a low angle and scrape the softened texture off. Work in small sections. If the material isn’t coming off easily, spray it again and wait a bit longer. Never force it or you’ll damage the drywall underneath.
5. Bag the Debris Immediately
Scoop wet debris straight into heavy-duty trash bags. Don’t let it dry out on the plastic sheeting. Double bag it and seal each bag tight before moving to the next section.
6. Vacuum with a HEPA Filter
Once the ceiling is scraped, go over the entire surface and the plastic sheeting with your HEPA vacuum. This picks up any leftover dust or small particles you might have missed.
7. Clean Yourself Before Leaving the Room
Vacuum your coverall suit before removing it. Wash your hands and face right after. This small step keeps you from tracking dust through the rest of your home.
Mistakes to Avoid
A few habits turn this project from safe to risky fast. Watch out for these.
- Dry scraping to save time. This is the single biggest mistake people make.
- Using a box fan to “air out” the room while working. This spreads fibers instead of removing them.
- Skipping the respirator because it feels uncomfortable. Wear it the entire time.
- Sweeping dry debris with a broom. This kicks particles into the air.
- Leaving windows open for ventilation during active scraping. Keep the room sealed until cleanup is done.
- Removing your coverall suit inside your living space. Change in the sealed room only.
When You Should Call a Professional Instead
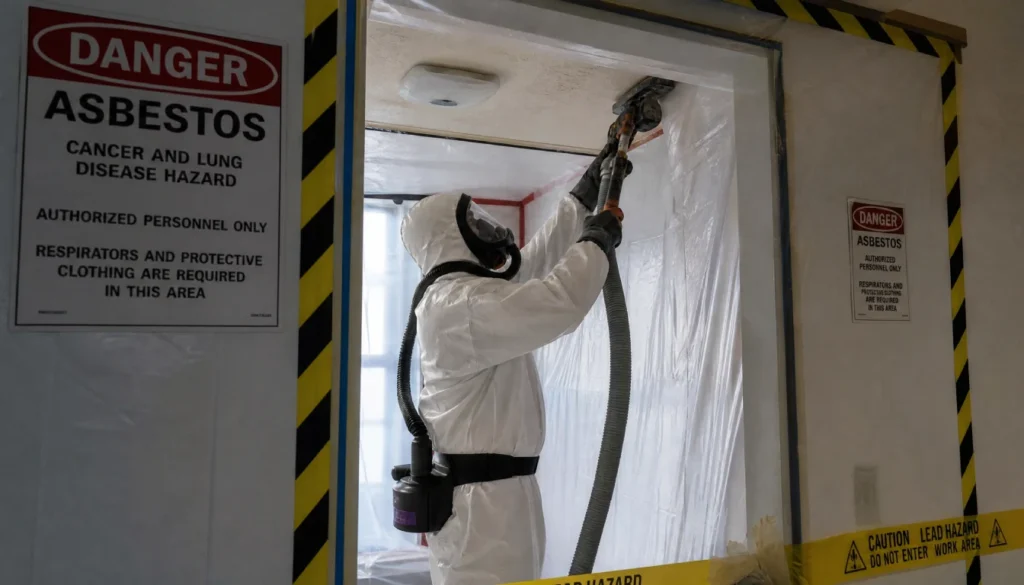
I want to be honest with you here. The wet scrape method works well for small rooms and manageable ceilings. But there are times when hiring a professional makes more sense.
If you’re covering a large square footage, if your ceiling is crumbling or already damaged, or if anyone in your home has respiratory issues, professional abatement is worth the cost. Some states also have legal requirements around asbestos disposal that a licensed contractor already knows how to handle.
Popcorn Ceiling Removal Cost: DIY vs Professional
| Factor | DIY Wet Scrape | Professional Removal |
|---|---|---|
| Average cost per room | $50 to $150 in supplies | $1,000 to $3,000 |
| Time needed | One full weekend | One to three days |
| Risk level | Higher, depends on technique | Lower, handled by trained crew |
| Disposal | You handle it | Included in service |
| Best for | Small rooms, tight budgets | Large homes, damaged ceilings |
What If You Don’t Want to Remove It at All
Removal isn’t your only option. You can also cover a popcorn ceiling instead of tearing it off. A thin layer of joint compound skim-coated over the texture smooths everything out without disturbing the material underneath. Ceiling tiles or a drywall layer installed directly over the popcorn texture work too. Both options avoid the disturbance that creates airborne fibers in the first place.
Frequently Asked Questions
Do all popcorn ceilings have asbestos?
No. Popcorn ceilings installed after 1980 usually don’t contain asbestos, since it was banned from most building materials around that time. But if your home is older or you’re unsure of the installation date, treat it as if it does.
Is it dangerous to remove a popcorn ceiling without testing?
It can be, if you skip proper precautions. The danger comes from breathing in airborne fibers, not from the material sitting untouched on your ceiling. Following the wet method and wearing protective gear lowers that risk significantly.
Can I remove a popcorn ceiling myself safely?
Yes, for most small to medium rooms, as long as you follow the wet scrape method, wear a P100 respirator, and dispose of debris properly. Larger jobs or already damaged ceilings are better left to professionals.
How long does popcorn ceiling removal take?
A single average-sized room usually takes four to six hours, including setup, wetting, scraping, and cleanup. Larger homes or multiple rooms can stretch into a full weekend project.
What should I do with the debris after removal?
Bag it while it’s still wet, double bag for extra protection, and check your local waste management rules. Some areas require asbestos-suspected material to go to a specific disposal facility rather than regular trash pickup.
Final Thoughts
Removing a popcorn ceiling without testing for asbestos first is doable, and thousands of homeowners do it every year. The key isn’t skipping precautions. It’s building your whole process around the assumption that asbestos could be there.
Wet the material, contain the room, wear your gear, and clean up carefully. Those four habits protect you no matter what that ceiling turns out to be made of.
If you’ve tackled this project yourself, I’d love to hear how it went. Drop a comment with your experience, ask any questions you still have, or share this guide with someone else staring up at their own popcorn ceiling right now.