
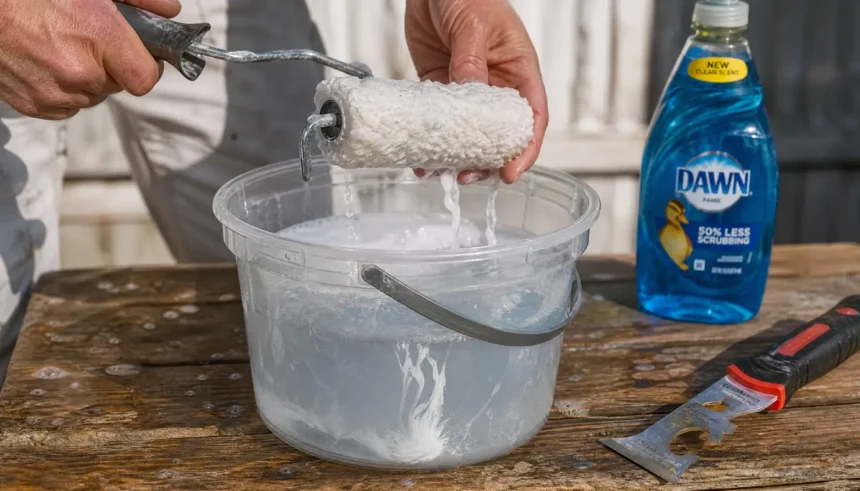
You just finished painting, and now you’re staring at a soggy, paint-filled roller. You’re wondering if it belongs in the trash.
Here’s the good news. If you know how to clean a paint roller fast, you can save that roller and use it again next weekend. You don’t need special tools. A faucet, a bit of dish soap, and one simple trick will get the job done.
This guide walks you through the fast method for both latex and oil-based paint. You’ll also learn how to dry the roller in minutes and store it so it’s ready the next time you paint.
Why Reusing a Paint Roller Is Worth the 5 Minutes
A decent roller cover costs anywhere from $5 to $15. Toss one after every project, and that adds up fast.
Cleaning takes about five minutes once you know the steps. Compare that to driving to the store for a new roller, and the choice is obvious.
There’s also less waste going down the drain or into a landfill. A roller you clean properly can last through six or seven paint jobs before the nap wears out.
Tools & Supplies You’ll Need (Quick Checklist)
Before you start, gather these items. You probably already have most of them.
- A 5-in-1 painter’s tool or a paint scraper
- Dish soap (a few drops is plenty)
- A bucket or your sink
- Warm water
- A mesh paint strainer bag (for the sink drain)
- An old towel or rag
That’s it. No spinner tool required, though one speeds up drying if you have it.
The Fast Method: How to Clean a Paint Roller After Water-Based Paints
Most interior paints are latex, which means water-based cleanup. This is the easiest scenario, and it’s where most beginners waste time.
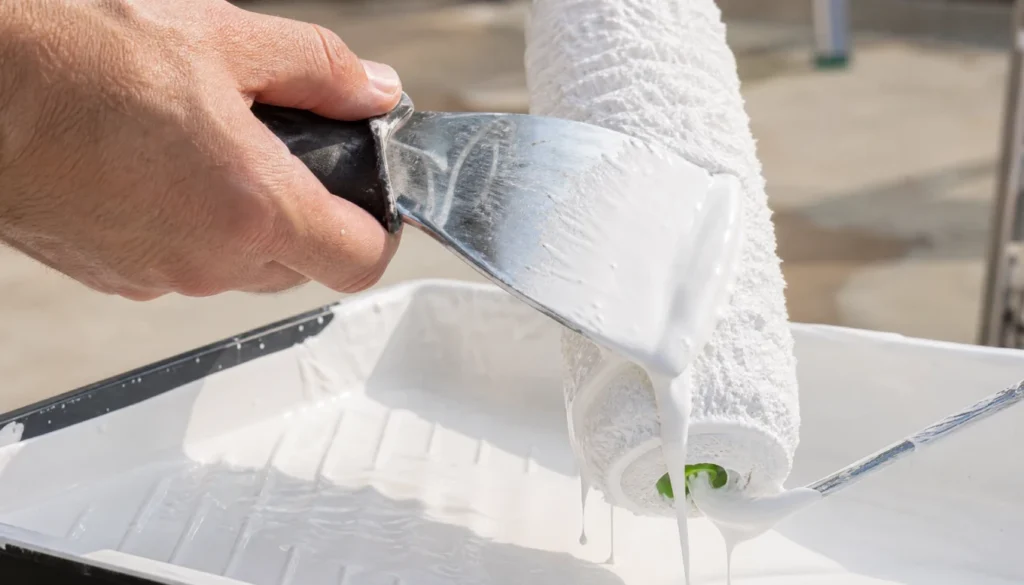
Step 1: Scrape off the extra paint. Run your 5-in-1 tool or scraper along the roller nap. Push the paint back into the tray or can. This one step saves you multiple rinses later.
Step 2: Rinse under warm water. Hold the roller under the tap. Squeeze the nap with your hand while the water runs through it. You’ll see the color start to fade fast.
Step 3: Add soap and work it through. Add a few drops of dish soap directly to the wet nap. Massage it in with your fingers, working from the top down.
Step 4: Rinse until the water runs clear. Keep rinsing and squeezing. When the water coming off the roller is clear, you’re done.
I used to toss rollers after every job until I figured out this trick. Now I clean one in under five minutes and reuse it for three or four rooms before it needs replacing.
One warning: don’t rinse straight into the sink without a strainer. I clogged my kitchen drain the first time I tried this. Paint sludge built up in the pipe and I spent an hour with a plunger. Now I put a mesh bag over the drain before I rinse anything, and it catches every bit of sludge.
Cleaning Oil-Based Paint Off a Roller – The Safe Way
Oil-based paint won’t rinse out with water and soap. You need a solvent, and you need to handle it carefully.
- Work in a well-ventilated space, ideally outdoors.
- Pour a small amount of paint thinner or mineral spirits into a container.
- Dip and squeeze the roller repeatedly, changing the solvent once it turns cloudy.
- Follow with a warm, soapy water rinse to remove the last traces of solvent.
- Let the solvent-soaked rags dry flat outdoors before disposal. Never ball them up while wet, since oily rags can combust on their own.
Check your local regulations before you pour used solvent down a drain. Many areas require you to take it to a hazardous waste facility instead.
How to Dry a Paint Roller in Minutes Without a Spinner
Once the roller is clean, water is still trapped deep in the nap. Left wet, it can grow mold or lose its shape.

Take the roller outside and swing it in a wide arc, like an underhand pitch. The motion flings most of the water out in a few seconds. Do this over grass or a driveway, not near your house siding.
After a few flicks, stand the roller on its end on a towel, or hang it from a nail so air reaches all sides. It should be dry within an hour.
I tried the dish-soap-only method on a roller caked with latex ceiling paint. I expected it to take forever. After scraping, two soap rinses, and a few flicks, the nap was soft and white again within ten minutes.
Storing a Clean Roller for Next-Day Reuse (or Longer)
For the next day: Wrap the still-slightly-damp roller in plastic wrap or a sealed plastic bag and put it in the fridge. This is a common trick among painters and it keeps the nap from drying out. Just don’t skip this step, or the roller will need a full wash again in the morning.
For long-term storage: Make sure the roller is completely dry first. Store it standing up, or hang it, so the nap isn’t compressed against any surface. A flattened nap won’t hold paint evenly next time.
Keep rollers away from direct sunlight and extreme heat, since both can dry out and crack the material over time.
3 Roller-Ruining Mistakes Beginners Keep Making
Mistake 1: Letting paint dry on the roller. Even an hour of drying time makes latex paint far harder to remove. Clean the roller as soon as you’re done painting.
Mistake 2: Leaving the roller soaking in water overnight. This seems like a shortcut, but it breaks down the glue holding the fibers to the roller core. You’ll end up with fibers shedding onto your walls next time you paint.
Mistake 3: Skipping the scrape step. Some people jump straight to rinsing. This wastes water and soap, and it takes three times longer to get the roller clean. Always scrape first.
Quick Recap: The Fast Method in 3 Steps
If you only remember one thing from this article, remember this sequence:
- Scrape the excess paint back into the tray.
- Rinse and soap the roller under warm water, squeezing as you go.
- Final rinse and spin (or flick) until the water runs clear and most water is gone.
That’s how to clean a paint roller fast, whether you’re wrapping up a single wall or a whole room.
Final Thoughts
Knowing how to clean a paint roller fast turns a wasteful habit into a five-minute routine. Scrape first, rinse and soap for latex, use solvent carefully for oil-based paint, then dry and store the roller properly.
Try this method after your next project. You’ll likely get three or four more uses out of a single roller cover, and your wallet and your drain will both thank you.
Have a roller-cleaning trick of your own? Drop it in the comments below. I read every one and try out the best tips myself.