Last summer, my laptop sounded like a tiny jet engine every time I opened a browser tab. I panicked. I thought the motherboard was dying. Then a friend told me it was probably just dust. I didn’t own a screwdriver set. I didn’t want to void my warranty by cracking the case open either.
So I found a way to clean the fan without opening the laptop at all. My laptop went from sounding like it was about to take off to running dead quiet in about fifteen minutes. No tools. No stress.
If your laptop is loud, hot, or acting sluggish, you’re probably dealing with the same dust buildup I had. This guide walks you through exactly how to clean a laptop fan without tools, using stuff you likely already have at home.
Why Your Laptop Fan Gets Dirty in the First Place
Your laptop pulls in air to cool itself down. That air carries dust, hair, and skin cells right along with it. Over time, that gunk sticks to the fan blades and clogs the vents.
This is normal. It happens to every laptop, especially if you use it on a bed, couch, or carpet. Soft surfaces block airflow and trap even more dust near the vents.
The good news is you don’t need to be tech-savvy to fix this. You just need the right approach and a little patience.
Signs Your Laptop Fan Needs Cleaning
Before you start, check for these warning signs. They tell you the fan is struggling.
- The fan runs loud, even during simple tasks like browsing or typing
- The laptop feels hot on the bottom or near the keyboard
- The computer slows down or freezes during normal use
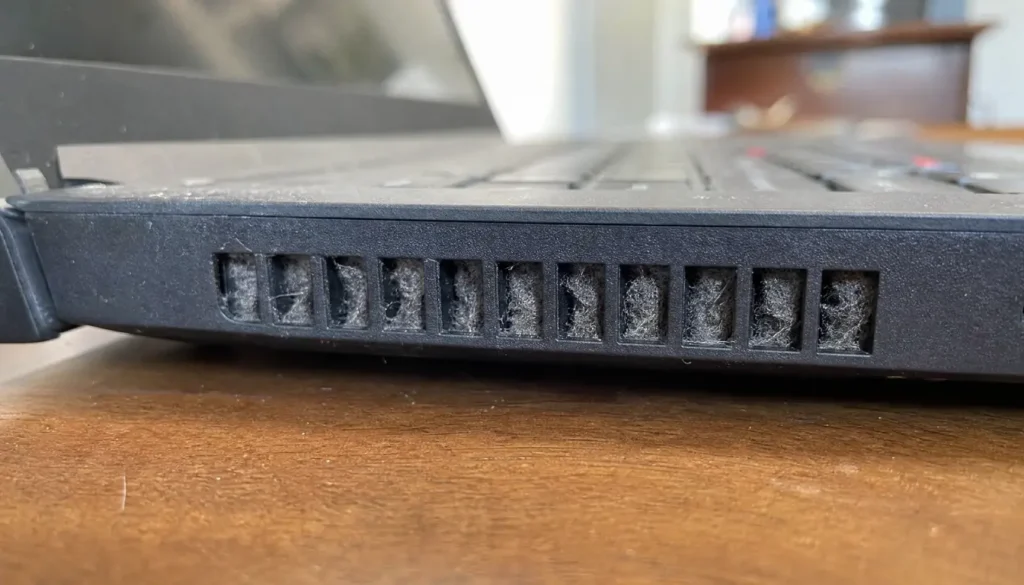
- You notice visible dust around the vents or exhaust ports
- The fan spins constantly, even when the laptop is idle
If you spotted two or more of these, your fan needs attention. Let’s get into how to clean it safely.
How to Clean Laptop Fan Without Tools: 7 Methods That Work
1. Use a Can of Compressed Air (No Screwdriver Required)
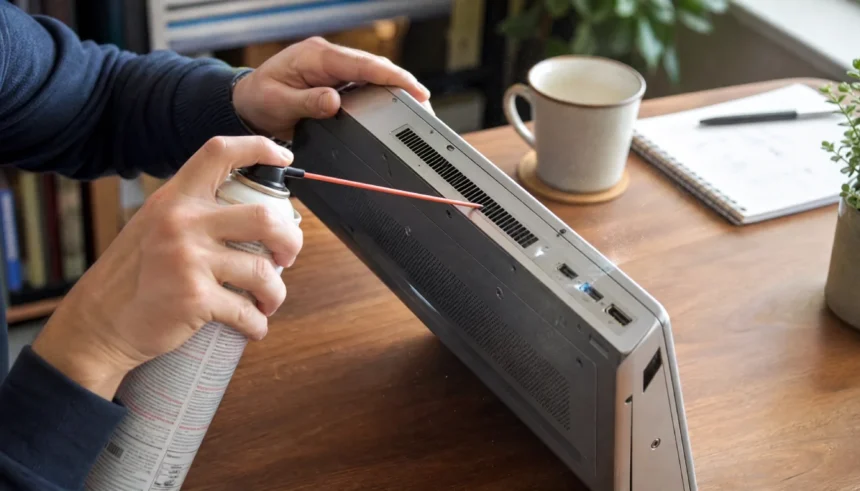
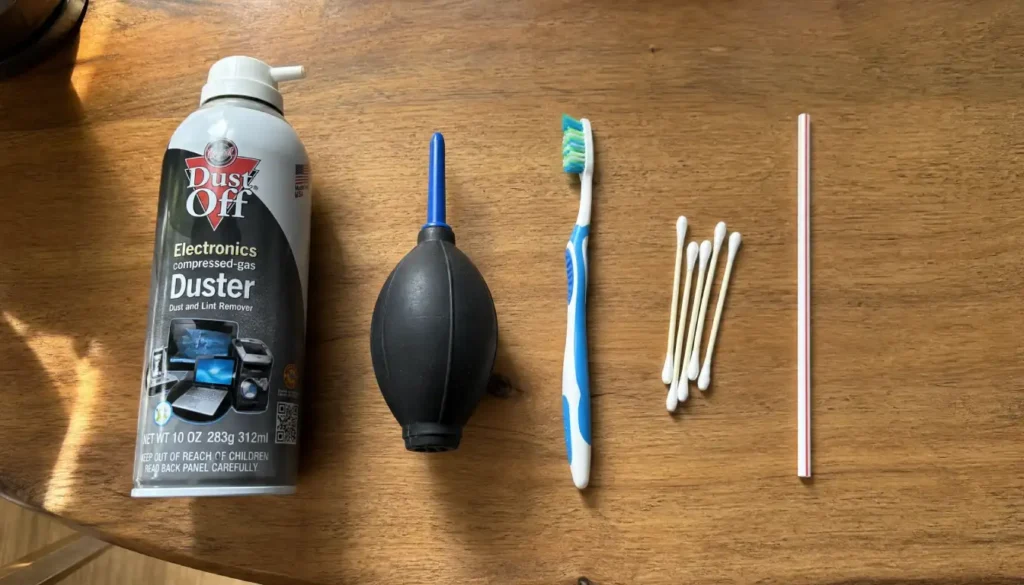
This is the fastest and safest option if you want results without opening your laptop. Compressed air blasts dust straight out of the vents.
Here’s how to do it:
- Shut down your laptop completely and unplug it
- Hold the can upright to avoid spraying liquid propellant
- Aim the nozzle at the exhaust vent, usually on the side or back
- Spray in short bursts, two to three seconds at a time
- Let the fan spin freely; don’t hold the blades still
Do this outdoors or near an open window. The dust cloud gets messy fast.
2. Try a Manual Air Blower or Silicone Bulb
If you don’t want to buy compressed air, a manual air blower works just as well. These rubber bulbs are cheap and reusable, and many people already own one from cleaning camera lenses.
Squeeze the bulb directly at the vent opening. Repeat several times. It takes more effort than a can of compressed air, but it gets the job done without any chemicals or pressure risk.
3. Use a Vacuum With a Crevice Tool
A vacuum can pull dust out instead of pushing it further in. This matters because blowing dust the wrong direction can push it deeper into the laptop.
Set your vacuum to its lowest suction setting. Attach the narrow crevice tool. Hold it close to the vent without touching it directly. Let it pull dust out for ten to fifteen seconds per vent.
Skip this method if your vacuum doesn’t have adjustable suction. Full power can damage internal fan blades.
4. Brush the Vents With a Soft Toothbrush
A clean, dry toothbrush works surprisingly well for loosening dust around external vents and keyboard gaps.
Gently brush along the vent openings using small strokes. This won’t reach deep inside the fan, but it clears surface dust and opens up the airflow path so other methods work better.
Pair this with compressed air or a vacuum for the best results.
5. Use a Cotton Swab for Tight Spaces
Cotton swabs are great for small gaps near the hinge or edges of the laptop where dust tends to build up. Dip one lightly in isopropyl alcohol if the area looks greasy, or use it dry for loose dust.
Never push the swab into the fan itself. Stick to the outer edges and visible dust pockets.
6. Blow Air Through a Straw
This sounds simple because it is. If you don’t have any tools or gadgets on hand, a plastic straw pointed at the vent and a few sharp breaths can dislodge light dust buildup.
This won’t replace compressed air for heavy dust, but it works well as a quick fix between deeper cleanings.
7. Use a Cooling Pad to Reduce Future Dust Buildup
This one isn’t a cleaning method, but it prevents the problem from coming back. A cooling pad lifts your laptop off soft surfaces and improves airflow underneath.
Less contact with carpet, blankets, or couch cushions means less dust getting pulled into the fan in the first place.
Comparison: Which No-Tool Method Works Best?
| Method | Best For | Effort Level |
|---|---|---|
| Compressed air | Heavy dust, fast results | Low |
| Manual air blower | Reusable, chemical-free option | Medium |
| Vacuum with crevice tool | Pulling dust out safely | Medium |
| Soft toothbrush | Surface dust and vent edges | Low |
| Cotton swab | Tight corners and hinges | Low |
| Straw | Light, quick touch-ups | Low |
| Cooling pad | Preventing future buildup | None |
Mistakes to Avoid When Cleaning Your Laptop Fan
Getting this wrong can cause more damage than the dust itself. Watch out for these common errors.
- Don’t use a vacuum on full power directly against the fan blades
- Don’t spray compressed air in long, continuous blasts; short bursts work better
- Don’t clean your laptop while it’s plugged in or powered on
- Don’t use liquid cleaners near the vents
- Don’t hold the fan blades still while blowing air into them
Skipping these mistakes protects your laptop and keeps the fan spinning freely for longer.
How Often Should You Clean Your Laptop Fan?
Most laptops need this kind of cleaning every three to six months. If you have pets, live somewhere dusty, or use your laptop on soft furniture often, aim for every two to three months instead.
Set a reminder on your phone. It takes ten minutes and saves you from bigger overheating problems down the road.
Does Cleaning Your Laptop Fan Actually Improve Performance?

Yes, and the difference is noticeable. A clean fan cools your laptop faster, which stops your processor from slowing itself down to avoid overheating. That slowdown is called thermal throttling, and it’s one of the biggest reasons laptops feel sluggish over time.
Once I cleaned my fan, my laptop stopped lagging during video calls and stayed cool even after hours of use.
FAQs
Can you clean a laptop fan without taking it apart?
Yes. Compressed air, a vacuum with a crevice tool, or a manual air blower can all clear out dust through the external vents without opening the case.
Is it safe to use a vacuum on a laptop fan?
It’s safe if you use low suction and a narrow attachment. Full power vacuums can spin the fan blades too fast and damage the motor.
Can I use a hair dryer to clean my laptop fan?
No. Hair dryers push warm air and can carry moisture or static into the laptop. Stick to compressed air or a manual blower instead.
What household items can I use to clean my laptop fan?
A soft toothbrush, cotton swabs, and a plastic straw all work for light dust removal without needing any special tools.
How do I know if my laptop fan is blocked by dust?
Loud fan noise, a hot bottom panel, and slower performance are the clearest signs. Visible dust around the vents confirms it.
Final Thoughts
Cleaning your laptop fan without tools isn’t complicated. You don’t need a screwdriver, a repair manual, or a trip to the store. A can of compressed air, a soft brush, or even a straw can bring your laptop back to life.
Take fifteen minutes this weekend and give your laptop some care. Your fan will run quieter, your laptop will run cooler, and you’ll avoid bigger repair costs later.
Have you tried any of these methods? Let me know which one worked best for you, or share your own no-tool cleaning trick in the comments. Your laptop and your ears will thank you.